Minecraft, a digital canvas for boundless creativity, becomes even more enchanting with the integration of mods. Litematica, a highly acclaimed modification, introduces a plethora of features that elevate the building experience. In this in-depth guide, we will delve into the intricacies of loading a schematic with Litematica in Minecraft, providing a detailed walkthrough for both novice and experienced players.
Understanding the Fundamentals
1. Install Litematica:
Before embarking on the journey of schematic loading, ensure that Litematica is correctly installed on your Minecraft client. Detailed installation guides are available here catering to different operating systems. It is crucial to confirm that the mod is compatible with your specific Minecraft version to ensure optimal functionality.
2. Organize Schematics:
Litematica relies on schematics, essentially saved blueprints of your creations. Organize your schematics meticulously by placing them in the designated folder within your Minecraft directory. Navigate to the .minecraft folder, locate the “schematics” directory, and ensure your blueprints are ready for deployment.
Loading a Schematic: A Step-by-Step Expedition
1. Initiate Litematica:
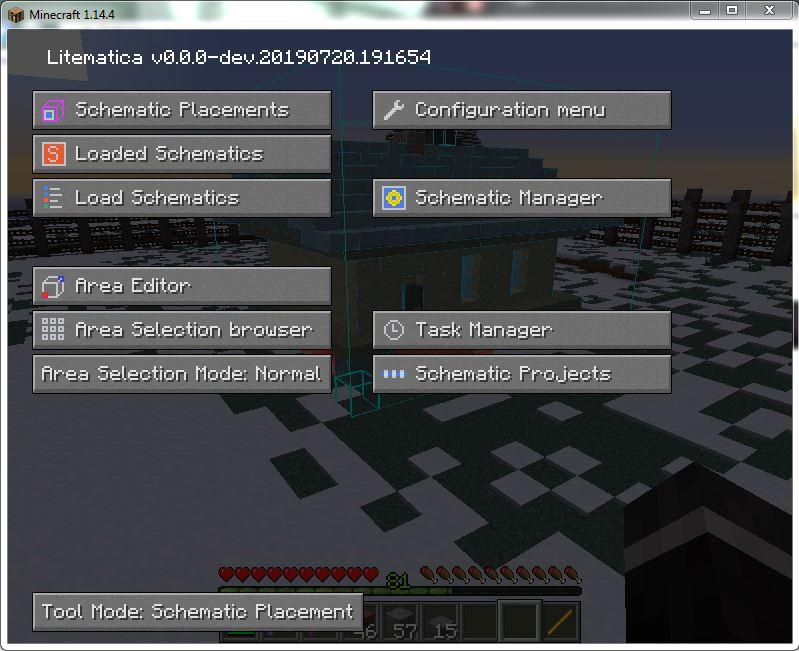
Commence your journey into the world of Litematica by launching Minecraft and pressing the “M” key. This action unveils the Litematica user interface, your gateway to a realm of advanced building tools.
2. Access Schematics Repository:
Click on the “Load Schematics” button within the Litematica interface. This action opens a window showcasing the schematics stored in your designated folder. It’s at this juncture that you select the blueprint you wish to load into your current Minecraft world.
3. Select Desired Schematic:
Browse through your meticulously organized schematics and select the blueprint that aligns with your creative vision. Once the choice is made, press the “Load Schematic” button to seamlessly import the schematic into your current Minecraft realm.
4. Prepare the Building Canvas:
With the schematic now loaded, shift your focus to the Minecraft world. Clear the designated building area of any unwanted structures or debris, ensuring you have a pristine canvas for your impending creation.
5. Unlock Schematic Placement:
Press “M” once again to reopen the Litematica interface. This time, choose the “Schematic Placement” option, unlocking an array of tools for adjusting the position and orientation of your loaded schematic.
6. Precision Placement:
Utilize the placement tools thoughtfully provided by Litematica to move the schematic to your desired position. The mod offers intuitive controls for precise adjustments, empowering you to align the blueprint seamlessly with your construction site.
7. Fine-Tune the Placement:
Take advantage of the detailed controls provided by Litematica to fine-tune the placement. Whether it’s rotation, elevation, or other parameters, these adjustments ensure that your creation aligns flawlessly with your creative vision.
8. Commence Building:
Once content with the placement, it’s time to breathe life into your creation. Equip the necessary materials and commence building, guided by the blueprint laid out by the loaded schematic. This marks the culmination of the loading process and the initiation of your creative endeavor.
Pro Tips and Considerations
1. Preserve Your Progress:
As you navigate the intricate world of building, remember to periodically save your progress. Litematica provides options to save your current schematic state, enabling you to revisit or share your work at a later time.
2. Collaborative Crafting:
For those participating in multiplayer servers or engaging in collaborative projects, ensure that all participants have access to the same schematics. This guarantees consistency in the build and fosters a harmonious creative environment.
3. Experiment with Advanced Features:
Beyond the basic loading steps, Litematica offers a plethora of advanced features, including undo and redo functions, precise material management, and real-time editing. Experimenting with these features adds depth to your creative toolbox, allowing for more intricate and sophisticated builds.
Conclusion
In conclusion, mastering schematic loading with Litematica in Minecraft opens up a realm of creative possibilities. Whether you’re a seasoned builder or a newcomer to the art of construction, this comprehensive guide equips you with the knowledge to seamlessly integrate schematics into your Minecraft world.
As you embark on your creative journey, remember to explore the advanced features offered by Litematica, experiment with different building techniques, and, most importantly, savor the joy of bringing your imaginative visions to life within the pixelated landscapes of Minecraft. Happy building!